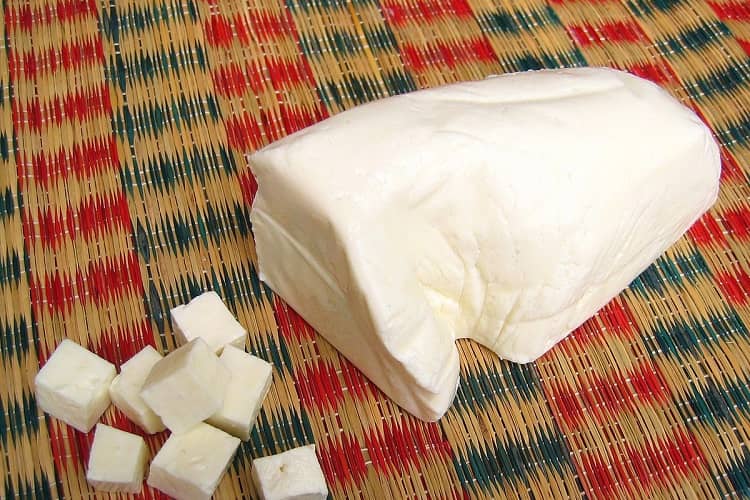
Paneer, or fresh Indian cheese, is simple to produce at home. It’s rich and creamy, and so much better than store-bought! Ideal for vegetarian Indian dishes.
It only takes an hour or two to prepare and is quite simple to do with this How to Make Paneer step-by-step guide.
Why Is This Homemade Paneer So Delicious?
If you’re wondering why you should learn how to make paneer instead of just buying it, here’s the deal:
- This paneer from scratch is the creamiest you’ve ever had. There’s no contest.
- It’s simple to learn how to prepare paneer. It takes from 40 minutes to 2 hours to put together. It just takes around 15 minutes of active time; the paneer pressing takes the rest of the time.
- The texture is superior to that of a restaurant or Indian supermarket.
- Instead of small hard, dry-ish cubes, it’s richer and tastes like melty cheese curds.
- In vegetarian Indian dishes like saag paneer, our handmade paneer shines.
Paneer: How to Make Homemade Paneer
 Food: Home Made Paneer (Source: Wikipedia)
Pour the milk into a big, heavy-bottomed pot and set it over medium heat. Bring the milk to a simmer. The milk should have a coating of bubbling foam on top and a rich, aromatic aroma.
Milk in a frothy, almost boiling pot
Remove the pan from the heat as soon as the milk begins to boil and mix in the lemon juice. The milk should separate into curds and whey (white cottage cheese and yellowy liquid) as you stir.
Making handmade Indian cheese is simple and quick with this step-by-step guide on how to create paneer! It’s a must-have for vegetarian Indian cuisine because it’s so rich and creamy. #cheese #vegetarian #lowcarb #indian #indianfood
Pour the curds and whey through a strainer lined with two layers of cheesecloth. Only the solid white curds will remain. Save the whey for another purpose, such as lacto fermentation or whey drinks.
Curds are poured into a colander.
To remove any lemon flavor, rinse the curds under running water.
Under running water, curds
Toss the solid curds with a pinch of salt, then wrap them in cheesecloth and squeeze as tightly as possible to extract as much liquid as possible.
Adding salt to curds
Cheese with less water is creamier.
Live it.
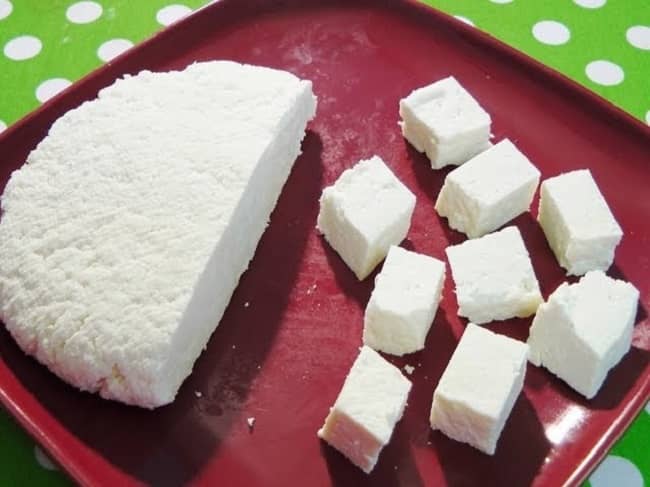
Flatten the ball of curds in the cheesecloth into a disc once you’ve squeezed out as much water as you can.
Making paneer by flattening a curd ball
To make the smoothest top, lay the cheesecloth over the disc as flat as possible. Place another plate on top and weigh it down with a couple of cans. Refrigerate for 20 to 2 hours.
Cheesecloth-wrapped paneer
The firmer the cheese, the longer you press it. It will remain creamy and delicious, but it will not melt into your food. Paneer that has only been squeezed for 20-30 minutes may be difficult to cook or sauté. I suggest pressing for 90 minutes to 2 hours.
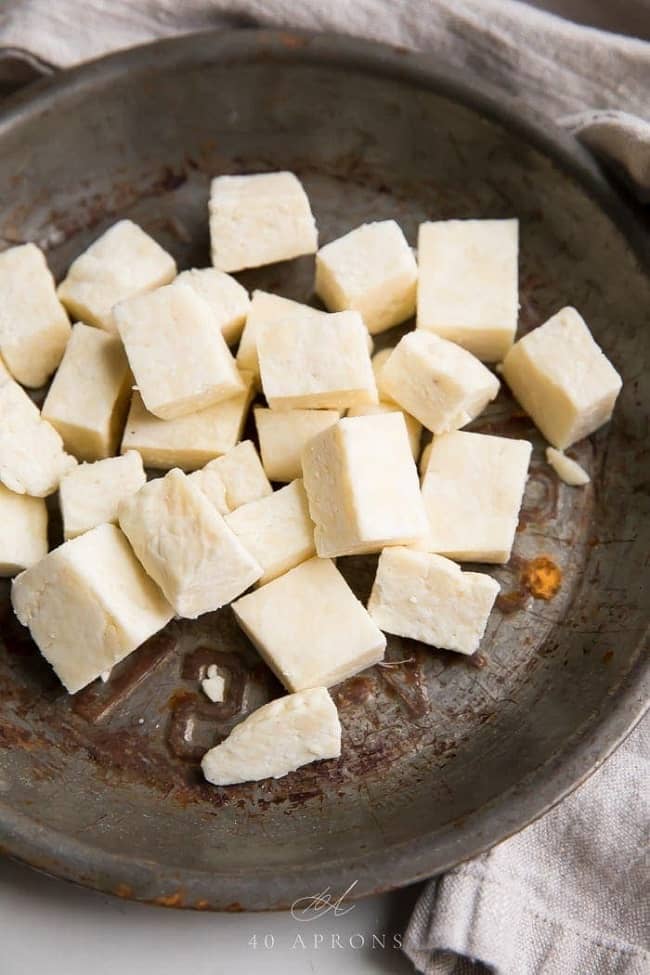
After that, unwrap the paneer and cut it into cubes.
Is it possible to use organic milk?
You can, however, it can’t be pasteurized at ultra-high temperatures (UHT), which is a usual technique for organic milk.
Pasteurization at ultra-high temperatures destroys key structures in milk that are necessary for curd formation for handmade cheese production.
For the creamiest, richest paneer ever, I prefer to use local, high-butter-fat milk that is processed at a low temperature.
You should be alright if you can locate organic milk that has not been pasteurized at a high temperature.
How long should I press the paneer?
You can certainly press the paneer for 20-30 minutes and then go about your business. However, rather than the solid cubes served in an Indian restaurant, this will result in a meltier cheese.
To really firm up my homemade paneer without losing any richness or creaminess, I prefer to press it for 1-2 hours. For recipes that call for frying the paneer first, this yields a better result.
On cheesecloth, homemade paneer Indian cheese cubes
How to Make Homemade Paneer (Indian Cheese)
 Food: Home Made Paneer (Source: Wikipedia)
| Preparation time: 10 minutes 10 minutes to prepare 1 hour of pressing 1 hour 20 minutes total |
How to prepare paneer at home quickly and easily. This Homemade Paneer is insanely creamy and delicious, unlike anything you’ve ever had. Worth every second!
Ingredients
- 1/2 gallon whole milk, not UHT pasteurized. See Note
- 6 tablespoons fresh lemon juice
- 1 teaspoon salt
Equipment Needed
- cheesecloth
- large strainer
Instructions
- Heat the milk in a large heavy saucepan over medium heat. Bring the milk to a gentle boil. On top of the milk, a steamy, foamy layer will form, smelling rich and sweet. Stir it occasionally, scraping the bottom to avoid burning.
- Stir in the lemon juice after removing the pot from the heat. If the mixture does not curdle quickly into solid white curds and yellow liquid whey, that’s fine. If your milk does not curdle right away, see the Note for the next steps.
- Set a medium colander over a big bowl lined with cheesecloth. Scoop the solid white curds into the colander and pour the liquid whey into the bowl below. Save the yellow whey for additional use, such as Lacto fermentation.
- 1 teaspoon salt, sprinkled over the curds To incorporate the salt, toss the curds with your hands.
- Squeeze the curds in the cheesecloth as much as possible to remove the extra whey. Flatten the curds into a disc in the cheesecloth and smooth the edges of the cheesecloth over the top as much as possible. On top, place a dinner plate and weight it down with 1-2 cans or other heavy items.
- Refrigerate for at least 20 minutes, preferably 90 minutes to 2 hours, before pressing. The longer the cheese is pressed, the stiffer it becomes while maintaining its creaminess. Unwrap the paneer after pressing, cut into cubes, and use in a recipe or keep chilled for 3-4 days in an airtight container.
Notes
Most organic milk is ultra-high temperature pasteurized (UHT), which disrupts the structure of the milk and prevents it from curdling or binding properly, which is required for paneer and most homemade cheeses.
Ultra-high temperature pasteurized milk must be labeled as such by law, so check your labels and choose non-UHT milk instead (Not always labeled as such, but it will not say it is UHT pasteurized).
For my handcrafted cheeses, I utilize a local, low-temperature pasteurized, high-butterfat milk.
Cover and set aside for 10 minutes if your milk does not curdle immediately after adding the lemon juice.
The mixture should be divided into curds and whey after 10 minutes–the whey is the yellowy watery liquid. Add another tablespoon of lemon juice or vinegar if the mixture hasn’t separated yet.
Nutrition Information
Calories: 81kcal, Protein: 3g, Fat: 7g, Saturated Fat: 4g, Cholesterol: 18mg, Sodium: 7mg, Calcium: 136mg