- Food: Pita Bread
- Writer: Nicolas Wilson
- Content-Type: Food Blog
You won’t be able to stop cooking this homemade pita bread recipe once you start! It outperforms any store-bought variety in terms of softness, puffiness, and flavor.
My friend Molly Yeh’s Short Stack Yogurt cookbook inspired me to make this handmade pita bread. It’s been on my list to attempt since the book came out two years ago, but for some reason, I never got around to it until this spring.
When I eventually did, what started as a fun one-time cooking experiment for Jack and me developed into a full-fledged pita bread obsession. Just so we could make it, we started putting extra yogurt on the grocery list!
If you’re thinking to yourself, “Wait. Yogurt? You’re not crazy if you say “in pita bread.”
Although yogurt isn’t a conventional pita bread component, Molly’s book is all about how it’s a flexible, tasty ingredient that’s also excellent for you. She uses it in a variety of dishes, including soup, cookies, ranch dressing, and mac and cheese.
 Food: Pita Bread (Source: Elavegan)
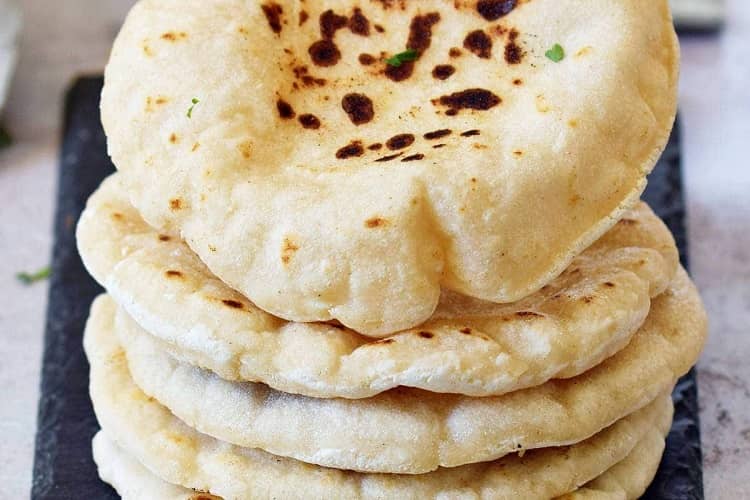
The secret ingredient, in my opinion, is what makes this pita bread so special. It has a tangy, sourdough-like flavor and is thicker, softer, and puffier than any other homemade or store-bought pita I’ve tried.
It’s just as good plain as it is with a filling or a dip, and, as Molly points out, it’d also make a terrific sleeping bag. If your experience is anything like ours, you won’t be able to quit once you start producing it.
Pita Bread: A Step-by-Step Guide
This recipe for pita bread is simple to make! This is how it works:
Make the dough first. Mix the yeast with a teaspoon of sugar and warm water to activate it.
When the yeast mixture has foamed, combine it with the flour, salt, remaining sugar, oil, and yogurt in the bowl of a stand mixer fitted with a paddle attachment. Knead the dough for 7 to 10 minutes, either with a stand mixer or by hand, until it’s soft and slightly sticky.
Allow the dough to rise once you’ve kneaded it. Cover it with a kitchen towel or plastic wrap and place it in an oiled basin. Allow for a 2-hour rest time, or until the dough has doubled in size.
The dough should next be divided into balls. You’ll divide this recipe into 12 equal portions because it makes 12 little flatbreads. Allow the balls to rise for another 20 minutes.
Roll out the pita bread next! Roll the dough balls into 1/4 to 1/2-inch thick circles with a rolling pin. As you roll out the pita, keep any dough you’re not working with covered.
Bake once you’ve rolled out all of the dough. Arrange the dough circles on two baking trays coated with parchment paper.
Preheat the oven to 500 degrees and bake one sheet at a time until the pita bread is puffy and golden brown on top. That concludes our discussion. Place the freshly baked pita on a wire rack to cool before serving.
Note: There are always a few pitas that don’t inflate up enough to form pockets when we make this pita bread recipe. That’s fine! They’re still delicious for dipping or as flatbreads.
Pita Bread Cooking Instructions
- Prepare your flour by weighing it. Because this pita bread recipe calls for a lot of flour, it’s best to weigh it. You’ll know exactly how much flour you’re using this way. Cup measurements are less precise because they might change depending on several factors (your specific measuring cups, how tightly you pack your flour, etc.). If you don’t have a kitchen scale, read this post for my best recommendations on how to measure flour with measuring cups if you don’t have one.
- One sheet at a time should be baked. Because oven temperatures vary, bake one sheet at a time for the most consistent results. You don’t want the bottom rack’s pita bread to burn before the top rack begins to brown! If you just have one baking sheet in the oven, you can put a rack in the middle to allow the pita to puff up.
- Toss the pan around. At around the 5-minute point, Jack and I start checking our pita bread a few minutes before we think it’ll be ready. If one side of the pan is more puffy or brown than the other at this point, we rotate it and bake for a few minutes longer to ensure that both sides cook evenly.
- Some can be frozen for later use. We almost usually freeze half of the quantity when we make this dish to have on hand for later nibbling. Pull the pita bread out of the oven just before it begins to brown if you wish to preserve and reheat it. Molly suggests freezing it or reheating it in the toaster, where it will brown without becoming crisp or burnt.
Suggestions for Serving Pita Bread
We enjoy eating this pita bread plain since it’s so soft, fluffy, and tasty! It’s also delicious with a variety of fillings, spreads, and dips. To get you started, here are a few suggestions:
- With crispy fried falafel, pickled red onions, tahini sauce, and fresh herbs assemble the sandwich.
- Put egg salad, vegan egg salad, or my chickpea salad sandwich filling inside.
- Toast it, cut it into wedges, and serve it with white bean dip and fresh vegetables on a crudité plate.
- Fill it with my simple chickpea shawarma.
- Scoop up spicy shakshuka or baked feta with it.
- For a light summer supper, top it with grilled vegetables and tzatziki sauce.
- Peanut butter, sliced banana, or apple, with honey, drizzled over top.
- For a healthful snack, dip it in hummus, baba ganoush, or curry red lentil dip.
Pita Bread
| Time to Prepare: 20 minutes Time to cook: 5 minutes Rising Time: 2 Hrs Time: 20 minutes Serves:12 |
This handmade pita bread is far superior to store-bought pita bread! It’s soft, fluffy, and tasty, and it’s equally good simple or with a topping or dip. Molly Yeh’s Yogurt is included in the Short Stack edition.
Ingredients
- 3/4 cup warm water
- 1 package (2 1/4 teaspoons), of active dry yeast
- 1 teaspoon plus 1 tablespoon of sugar
- 3 3/4 cups bread flour (469 grams), plus more for dusting
- 1 1/2 teaspoons sea salt
- 3 tablespoons extra-virgin olive oil, plus more for the bowl
- 3/4 cup whole-milk Greek yogurt, (we use Stonyfield)
Instructions
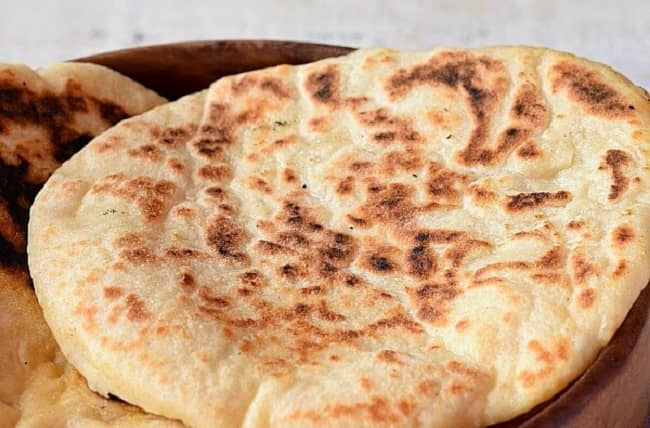 Food: Pita Bread (Source: Elavegan)
- Combine the water, yeast, and 1 teaspoon of sugar in a medium mixing basin. Allow about 5 minutes for the mixture to bubble up on top.
- Combine the flour, salt, and remaining tablespoon of sugar in a large mixing bowl or stand mixer fitted with a paddle attachment. Combine the yeast mixture, oil, and yogurt in a mixing bowl. Knead the dough for 7 to 10 minutes, either in the stand mixer or on a clean work surface, until it’s soft and somewhat sticky, adding extra flour as needed. Transfer the dough to an oiled bowl, cover it with a cloth or plastic wrap, and let rest for about 2 hours, or until doubled in size.
- Preheat the oven to 500°F and parchment paper two baking sheets.
- Divide the dough into 12 equal balls and place them on a clean work surface. Cover and set aside for another 20 minutes to rise.
- Roll the balls out into 1/4 to 1/2-inch thick circles. Place them an inch apart on the baking pans, then bake until puffed and lightly browned on top, one sheet at a time. Check every 5 minutes after that. We bake them for around 8 minutes, turning the pan after 5 minutes if one side puffs up more than the other. Allow the pitas to cool on a wire rack.
Notes
- These freeze beautifully. If you wish to preserve and reheat them, Molly suggests pulling them out of the oven just before they brown. Put them in the toaster to thaw; they’ll brown up a little as they toast.