
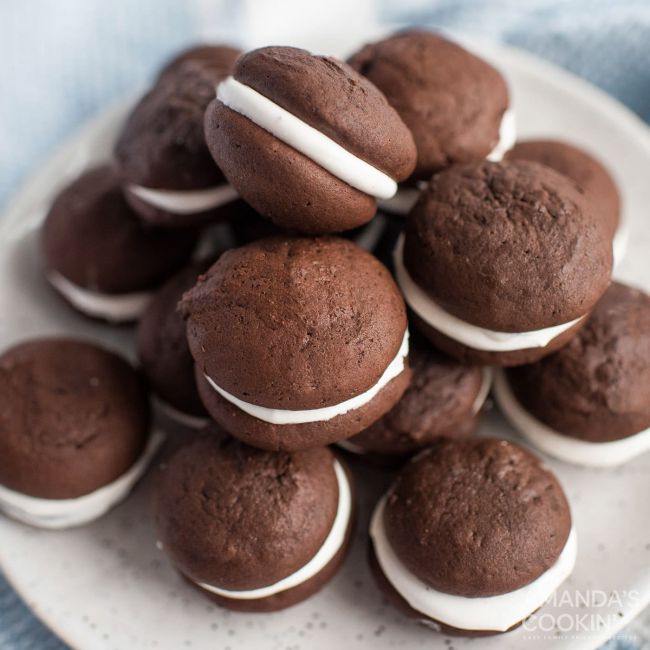
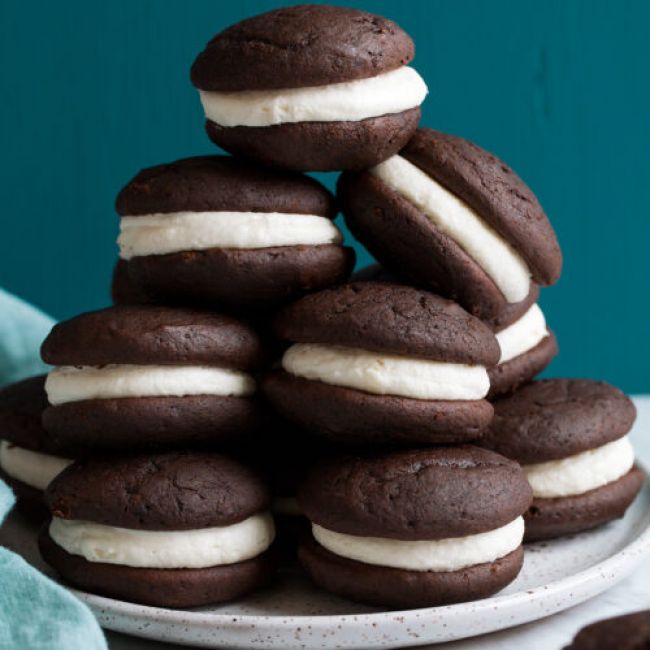
The best Whoopie Pies ever made—perfectly chocolatey, incredibly soft and fluffy, and filled with decadent marshmallow fluff.
These rich, cake-like cookies melt completely in your mouth with each bite!
Do you succumb to chocolate’s allure? Try my go-to Brownies, Whoopie Pies tempting Edible Chocolate Cookie Dough, my fave Chocolate Cake, and two additional flavor variations.
After all, February is National Chocolate Lovers Month, so we should celebrate.
The mouthwatering whoopie pie is often called Gobs—what a silly name!
This Pennsylvanian and New England favorite comes in a wide variety. However, the chocolate variant you’ll most frequently encounter online appears to be a cookie made with butter.
As a result, in my opinion, a more dense and dry cookie is produced, but for whoopie pies, I’m all about maintaining its light and fluffy texture (that classic Amish style).
Therefore, I use vegetable oil and water-based recipes to make the cookies, just like a traditional chocolate cake.
Additionally, the traditional filling is typically composed of shortening, which I don’t particularly enjoy, and raw egg whites, which I’m all right eating alone but uncomfortable offering to others.
To improve the flavor and texture of the filling, I substitute store-bought marshmallow fluff and butter.
What flavor are these Whoopie Pies? Of course chocolate cake, or anything resembling a Ding Dong but infinitely superior!
They have a rich, deep chocolate flavor, and are perfectly moist, and the fluffy marshmallow whoopie pie filling gives them a consistently light-as-air texture.
You’ll get requests for these delicious sandwich cookies again and over again since they’re so simple to make.
 Whoopie Pies(Pinterest)
Ingredients Required for the Filling and Chocolate Whoopie Pies (Plus Substitutes)
- I advise using unbleached all-purpose flour, although regular bleached all-purpose flour will also work.
- Use high-quality cocoa for the best-tasting cookies by using unsweetened cocoa powder.
- Baking soda: This gives cookies their rise. To ensure that it functions effectively, use baking soda that hasn’t expired.
- Don’t forget the salt; it will prevent the cookies from tasting bland.
- In an emergency, you can produce your light brown sugar. Measure out 1 cup of white sugar, leave out 1 tablespoon, and replace it with 1 tablespoon of molasses. Stir well.
- Don’t always have buttermilk on hand? Simply combine 1/2 cup of milk with 1 1/2 teaspoons of vinegar or lemon juice to create your own. 5. Minutes of rest.
- Canola oil or any other type of vegetable oil will do.
- Eggs help glue the ingredients together, but if you have a food allergy, you can check out these alternatives.
- You can also use vanilla bean paste and extract in equal parts.
- There is no need to heat hot water; just hot from the faucet will do.
Additional Supplies for the Filling Include:
- I use both salted and unsalted butter to counteract the filling’s richness. Because it doesn’t dissolve well, I dislike adding salt separately.
- If you prefer, you can omit the filling recipe entirely and substitute homemade marshmallow fluff. Marshmallow fluff is also known as marshmallow creme.
- Sugar in the form of powder thickens and sweetens the filling. Unfortunately, there aren’t many excellent alternatives to powdered sugar (also known as confectioners sugar) in frosting and fillings like this because of its incredibly fine, powdery texture.
Making Whoopie Pies: A Recipe
- Set oven racks in the upper and lower third of the oven and preheat to 375 degrees to prepare the oven and baking sheets. Set aside 18 by 13-inch parchment paper-lined baking sheets.
- Mixing bowl with dry ingredients whisked together are flour, cocoa powder, baking soda, and salt.
- Mix wet ingredients: Using an electric hand mixer or the paddle attachment on a stand mixer, thoroughly combine the brown sugar, buttermilk, vegetable oil, egg, and vanilla extract in a large mixing basin.
- Blend the wet and dry ingredients: Pour the hot water in, add the flour mixture, and stir just until combined.
- Pour batter onto baking sheets that have been prepared: Spoon batters out using a medium cookie scoop or 1 1/2 Tbsp at a time, and drop onto baking sheets that have been prepared, spacing them 2-inches apart.
- Bake until cookies spring back when touched or a toothpick inserted into the center of the cookies comes out clean, about 8 to 10 minutes total. Bake the first two sheets simultaneously, rotating sheets halfway through baking.
- Cool completely: Allow to cool for about five minutes, then transfer with a spatula to a wire rack to finish cooling. For 8 to 10 minutes, bake the last sheet of cookies in the center of the oven.
What is Whoopie Pie Filling Made Of?
- Butter and sugar in a cream: Unsalted butter, salted butter, and powdered sugar should be well blended in the bowl of an electric stand mixer with the paddle attachment (or using a hand mixer).
- Whip till fluffy: Turn the mixer’s speed up to high and whip for 4 minutes or until it becomes light and fluffy. Add vanilla and blend.
- Add marshmallow fluff and fold together with a rubber spatula just until incorporated after removing the bowl from the stand mixer.
- Refold after chilling the mixture for about 20 minutes to make it thicker.
- Embrace cookies: Place a second cookie on top and pipe the remaining frosting over half of the cookies using a piping bag with a large round tip.
How Are Whoopie Pies Storied?
- Keep them in a container with a tight lid and some parchment paper (I like to store them on a baking sheet covered with a lid).
- Keep for up to three days in the refrigerator.
- Allow sitting at room temperature for around 30 minutes before serving so that the filling and cookies can soften.
Advice for Making the Best Whoopie Pies
- To achieve a fluffy texture, don’t over-mix the batter. similar to the filling
- Sift the cocoa first if it appears lumpy here or whenever you bake with it.
- Before using, break up any clumps in the brown sugar with your fingertips if necessary. To keep the brown sugar moist, you might also want to think about getting one of those clay brown sugar disks.
- Before adding the filling to the cookies, let them cool down a little. Otherwise, it will become runny. The butter is resolidified in the refrigerator, resulting in a slightly stiffer filling.
- These should be kept out of the sun during the summer; unless they are served from a cooler, you shouldn’t serve them at an outdoor lunch gathering.
- No stacking, just one layer of storage Because they are moist, they will begin to cling together, and if they don’t, the filling will flatten and run out the edges.
 Whoopie Pies(Pinterest)
Potential Changes
- For an even fuller flavor, use Dutch cocoa.
- At your option, choose an egg white whoopie pie filling (no serving to elderly, children, and pregnant women).
- Use a filling with a distinct flavor, such as peanut butter, cream cheese, caramel, coconut, or chocolate. Or simply add a small amount of extract, such as coconut extract, to the filling recipe.
- Instead, use whipped cream that has been sweetened.
- The batter should contain 1 tsp of instant espresso powder.
- Use 1/2 a batch of vanilla or chocolate buttercream frosting to make a filling that is less likely to run.
- Whoopie pies with peppermint filling can be made during the holiday season by adding a little peppermint extract to the batter or filling and rolling the edges in finely crushed candy canes.
Additional Delectable Sandwich Cookies to Try
- Pumpkin-flavored oatmeal pies
- Whoopie Pies with Banana Bread
- Carrot Cake Cookies
- Oreos with red icing
- Alfajores
Ingredients
Cookies
- 2 cups (283g) unbleached all-purpose flour* (scoop and level to measure)
- 1/2 cup (45g) unsweetened cocoa powder (scoop and level to measure)
- 1 tsp baking soda
- 1/2 tsp salt
- 1 cup packed (200g) light brown sugar, break up any clumps
- 1/2 cup (120ml) buttermilk
- 1/2 cup (120ml) vegetable oil
- 1 large egg
- 1 1/2 tsp vanilla extract
- 1/2 cup (120ml) hot water
Filling
- 8 Tbsp (113g) salted butter, at room temperature
- 6 Tbsp (85g) unsalted butter, at room temperature
- 2 1/4 cups (270g) powdered sugar
- 1 tsp vanilla extract
- 10 oz. marshmallow fluff (aka marshmallow creme, about one and a half 7 oz. jars)
Instructions
- Preheat the oven to 375 degrees and place racks in the upper and lower third. Set aside 18 by 13-inch parchment paper-lined baking sheets.
- Mix the flour, cocoa powder, baking soda, and salt in a medium mixing basin. Place aside.
- Using an electric hand mixer or the paddle attachment on a stand mixer, thoroughly combine the brown sugar, buttermilk, vegetable oil, egg, and vanilla extract in a large mixing basin.
- Pour in the boiling water and whisk just until mixed before adding the flour mixture.
- Scoop batter onto prepared baking sheets with a medium cookie scoop or 1 1/2 Tbsp at a time, spacing them 2 inches apart.
- Bake the first two sheets simultaneously, turning the sheets over halfway through baking, for 8 to 10 minutes total, or until the cookies bounce back when touched.
- Allow to cool for about five minutes, then transfer with a spatula to a wire rack to finish cooling. For 8 to 10 minutes, bake the last sheet of cookies in the center of the oven.
To Fill
- Salted butter, unsalted butter, and powdered sugar should be thoroughly combined in the bowl of an electric stand mixer with the paddle attachment (or using a hand mixer).
- Turn up the mixer’s speed to high and whip for 4 minutes or until fluffy and light. Add vanilla and blend.
- Remove the bowl from the stand mixer, add the marshmallow fluff, and quickly fold everything together with a rubber spatula.
- Fold the mixture again after cooling for about 20 minutes to thicken. Place a second cookie on top and pipe the remaining frosting over half of the cookies using a piping bag with a large round tip.
- Cookies can be kept in the refrigerator for up to three days when placed in an airtight container and placed on parchment paper. Before serving, give the food a 30-minute rest at room temperature.
Notes
- A few reviewers have raised the concern that the batter is too runny. Make sure you are measuring the flour and cocoa correctly; instead of spooning and leveling, it should be scooped straight from the packet (or better yet use a scale). If you are concerned, simply add 1/4 cup of flour for a thicker batter.
Potential Changes:
- For an even fuller flavor, use Dutch cocoa.
- Use a filling with a distinct flavor, such as peanut butter, cream cheese, caramel, coconut, or chocolate. Or simply add a small amount of extract, such as coconut extract, to the filling recipe.
- Instead, use whipped cream that has been sweetened.
- The batter should contain 1 tsp of instant espresso powder.
- Use 1/2 a batch of vanilla or chocolate buttercream frosting to make a filling that is less likely to run.
- Whoopie pies with peppermint filling can be made during the holiday season by adding a little peppermint extract to the batter or filling and rolling the edges in finely crushed candy canes.